If you’ve ever cooked with scent leaf before, you already know how powerful it is. The aroma fills the kitchen, the taste brings life to soups and stews, and the health benefits are endless.
But here’s the thing: buying scent leaf every time from the market isn’t always convenient, and sometimes what you buy isn’t as fresh as you’d like.
That’s why learning how to plant scent leaf at home is such a game changer.
Imagine stepping out into your backyard, balcony, or even just a pot by your window, plucking fresh green leaves, and dropping them straight into your pot of rice, pepper soup, or stew.
It’s fresher, healthier, and saves money.
Plus, you’re in total control of what goes into your plant — no harmful chemicals, no pesticides.
In this guide, I’ll walk you through everything you need to know about how to plant scent leaf to make the process easy and doable for you.
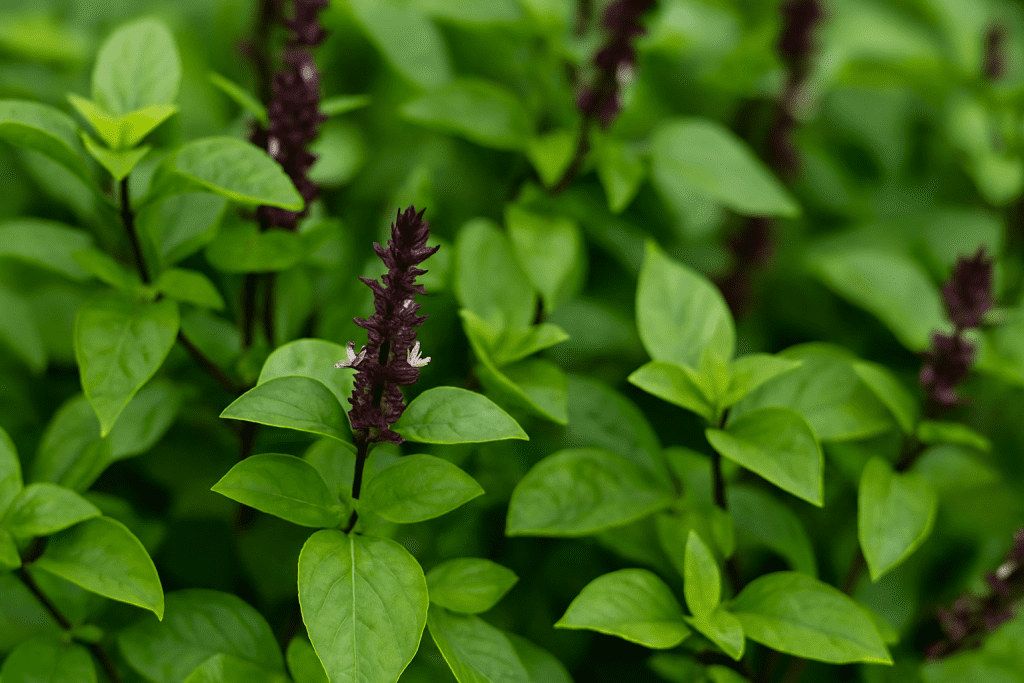
What is Scent Leaf?
Before you start planting, let’s get to know this wonderful plant better.
Scent leaf, scientifically called Ocimum gratissimum, is a tropical plant that belongs to the basil family.
In Nigeria, it’s commonly called “efirin” in Yoruba, “nchuanwu” in Igbo, “ntong” in Efik/Ibibio, and “daidoya” in Hausa.
Beyond its amazing taste, scent leaf is packed with medicinal properties. It’s used to treat indigestion, boost immunity, lower blood sugar, and even repel mosquitoes.
Scent leaf grows best in warm, tropical climates, just like what we have here in Nigeria. It loves sunlight, doesn’t like waterlogged soil, and responds well when pruned regularly.
If you treat it well, it can grow into a bushy, evergreen plant that keeps supplying you with fresh leaves for months.
👉 Learn more about its health benefits of scent leaf here.
Choosing the Right Location for Your Scent Leaves
Location is one of the most important decisions you’ll make when planting scent leaf.
Here’s why:
- Sunlight: Scent leaf needs about 6 to 8 hours of sunlight every day. Without enough sun, the plant becomes weak and leggy, and the leaves lose their strong aroma.
- Temperature: Because it’s a tropical plant, scent leaf grows best in warm weather. If you live in a cooler region, you can still grow it indoors with proper light.
- Space: If you’re planting outdoors, choose a spot where it won’t be overshadowed by taller plants. If indoors, a sunny window or balcony is perfect.
So whether you have a big backyard or just a pot in your kitchen, the main thing is to make sure your plant gets enough sun and stays warm.
Preparing the Soil for Planting Scent Leaves
Here’s the truth: your soil will make or break your scent leaf journey.
If you plant in poor soil, the leaves will look pale, growth will be stunted, and you’ll probably give up halfway.
But if you prepare the soil right, the plant will thrive with little effort.
- Soil Type: Scent leaf grows best in loamy soil that drains well. Avoid clay-heavy soils that trap water and suffocate the roots.
- Organic Matter: Enrich your soil with compost, animal manure, or organic fertilizer. This makes the soil fertile and supports continuous leaf production.
- Soil pH: Scent leaf prefers slightly acidic to neutral soil (pH 6.0 to 7.5). You don’t need to stress too much about this if you’re using rich garden soil.
👉 If you want a detailed guide on soil pH and fertility, check out University of Minnesota Extension.
| 💡Pro Tip: If you’re planting in pots, use a mix of 70% loamy soil and 30% organic compost. This ensures your plant gets enough nutrients while maintaining good drainage. |
Methods of Planting Scent Leaf
Now that you’ve got your soil ready, it’s time to choose how you want to plant.
There are two main ways:
1. Growing from Seeds
This method takes a bit more time and patience, but it’s rewarding.
- Step 1: Buy quality seeds from a trusted nursery or online store.
- Step 2: Start by planting the seeds in a small seed tray or container. Cover lightly with soil.
- Step 3: Water gently and keep the soil moist (not soggy).
- Step 4: Place the container in a sunny spot. Seeds usually germinate in 1–2 weeks.
- Step 5: Once the seedlings are about 3–4 inches tall, transplant them into your garden bed or larger pots.
– Advantages of Growing from Seeds:
- You get to start fresh with healthy plants.
- Seeds are cheaper and readily available.
2. Growing from Stem Cuttings:
This is the faster and easier method, and it’s what most people in Nigeria use.
- Step 1: Cut a healthy stem from an existing scent leaf plant (4–6 inches long).
- Step 2: Remove the lower leaves, leaving only a few at the top.
- Step 3: Place the cutting in water for a few days until roots start showing, OR plant directly into moist soil.
- Step 4: Keep the soil consistently moist until the plant establishes itself.
– Advantages of Using Cuttings:
- Faster growth compared to seeds.
- You’re cloning an existing plant, so you know exactly what you’ll get.
Step-by-Step Planting Process
Now that you know the two main planting methods (seeds or cuttings), let’s walk through the actual planting process.
Think of this as your recipe for success.
Step 1: Prepare Your Planting Spot or Pot
- If you’re planting in the garden, loosen the soil with a hoe or hand trowel. Make sure the soil is at least 6–8 inches deep so roots can spread easily.
- If you’re planting in a pot, ensure the pot has holes at the bottom for drainage. Remember, scent leaf hates waterlogged soil.
Step 2: Space Out Your Plants
If you’re planting multiple scent leaf plants in a garden bed, space them about 12–18 inches apart.
This gives them room to spread and grow bushy.
In a pot, you can grow 1–2 plants depending on the size.
Step 3: Plant Your Seedlings or Cuttings
- For seeds, make shallow holes (about half an inch deep), drop in the seeds, and cover lightly with soil.
- For cuttings, plant the rooted cutting directly into the soil and firm the soil around it gently.
Step 4: Water Gently
Water the soil immediately after planting, but don’t overdo it. Keep the soil moist — not soggy.
Think of it like wringing a wet sponge; that’s how moist your soil should feel.
Step 5: Place in Sunlight
Scent leaf is a sun lover. Place the pots or garden bed where it will get 6–8 hours of direct sunlight daily.
And that’s it!
With these simple steps, you’ve officially started your scent leaf journey.
Caring for Your Scent Leaf Plant
This is the fun part. Once your plant starts growing, your job is to keep it healthy and strong.
Luckily, scent leaf isn’t a fussy plant.
With a little attention, it will reward you with endless fresh leaves.
– Watering:
- Water regularly, especially during dry season.
- Keep the soil moist but not soggy. Overwatering can cause root rot.
💡Pro Tip: If the leaves start turning yellow, you might be overwatering. If they look dry and droopy, you need to water more often.
– Fertilizer and Feeding:
- Use organic manure or compost every 3–4 weeks to keep the soil fertile.
- Avoid chemical fertilizers because they reduce the natural flavor and medicinal quality of scent leaf.
👉 Learn more about organic fertilizers and how to make them yourself here.
– Mulching:
Add dry leaves, grass, or straw around the base of the plant.
Mulching helps the soil retain moisture and reduces weed growth.
– Pruning and Trimming:
This is one of the secrets to getting bushy plants. Regularly pinch off the top leaves once your plant grows about 8–10 inches tall.
This encourages side branches to grow, making your plant fuller.
– Pest and Disease Control:
Scent leaf naturally repels many pests (mosquitoes, flies, and even some worms).
But sometimes aphids or grasshoppers may attack.
- For a natural remedy, spray the leaves with a mixture of water and mild soap.
- Or use neem oil spray — it’s safe and effective.
Harvesting Your Scent Leaf
Now, here’s the part you’ve been waiting for — harvesting your fresh scent leaves.
– When to Harvest:
You can start harvesting once the plant is about 2 months old and has several sets of leaves.
Always wait until it’s established before plucking.
– How to Harvest:
- Use your fingers or small scissors to cut the top leaves.
- Always harvest from the top to encourage bushier growth.
- Don’t strip the plant bare — leave enough leaves for photosynthesis.
– Preserving Freshness:
- If you won’t use them immediately, wash the leaves gently and pat dry.
- Store them in the fridge in an airtight container or wrapped in a damp paper towel.
- You can also dry the leaves under shade and store them in airtight jars for later use.
Common Mistakes to Avoid
Even though scent leaf is easy to grow, beginners often make small mistakes that affect growth.
Let’s save you the stress:
- Overwatering: Too much water causes root rot. Always check the soil before watering.
- Poor Soil Choice: Planting in sandy or clay-heavy soil will stunt growth.
- Lack of Sunlight: If your plant isn’t getting enough sun, the leaves will be weak and less flavorful.
- Harvesting Too Early: Plucking before the plant is mature weakens it.
- Ignoring Pests: Even though scent leaf resists pests, ignoring infestations can damage your crop.
Avoid these mistakes, and your plant will thrive beautifully.
Bottom Line
Planting scent leaf at home is simple, rewarding, and surprisingly fun. With the right soil, sunlight, and care, you can have a constant supply of fresh, aromatic leaves for your cooking and health needs.
Now imagine this: instead of running to the market every time you want to make pepper soup, you just step outside, pluck a handful of fresh leaves, and drop them straight into the pot.
That’s freshness money can’t buy.
So, if you’ve been thinking about it, this is your sign — start planting today.